VR Inspector for Nuke Studio & Hiero

February 17, 2016

The Foundry’s VR toolkit is still only available for select companies. So just out of curiosity, I have decided to make a little toolkit myself for the day-to-day needs. One of the more simple yet quite handy tools is a VR viewer for NukeStudio and Hiero.

It supports both mono and stereo VR plates.

Here is a little demo of the tool:

FrameMedian for Nuke

January 20, 2016

Creating cleanplates is a common task in the VFX world.
When dealing with crowded/busy plates such as a intersection with pedestrians and cars, fireworks,snow, rain etc, its nice to use some form of automation, at least to get a good base.
Rich Frazer wrote a excellent example on how this process also can be automated by using the motion estimation plugins in NukeX to clean based on motion.
This method works well for larger moving objects but can however be somewhat time consuming and won’t work well on heavy plates such as this: Original
There is also the execelnt plugin by keller.oi called Superpose that seem to be the ultimate “off the self” solution to the problem.

But if we don’t have NukeX and the boss won’t spend money on plugins we can try the automation on our own.
The first thing to come to mind, is to stabilize the plate and use FrameBlend, but that usually ends up causing a lot of streaking and changes in the luminance and or chrominance:

frameblend

One of the better ways is to use the TemporalMedian node, however this only works across 3 frames. You could make a custom gizmo that combines a ton of TemporalMedian nodes, but its rather limited what you can get from 3 samples in a median.

This is where BlinkScript is super handy, as it comes with a build in median function.
So with nothing more than a few lines of code (1 line of process code), you can create a tool that allows you to do fine automated cleanplates in regular nuke.


FrameMedian is a BlinkScript that will allow you to do a TemporalMedian over up to 20 frames.

DiffrenceA

DiffrenceB

Features

Using the “Frame Range” process method you can specify a Start and End frame, and how many samples you want.
Then FrameMedian distributes samples evenly across that range.

You can also use the “Specified Frames” method, that allows you to specify what frames you want to sample.

UI

For the best result the input plate must be stabilized and not have too much chroma/luma alteration. So in case of Day-to-Night timelapses pick frames/frame range within same light.
Due to the nature of the median function more samples is not always better, so its good to try out different frame ranges and sample count.

The node in action:

FrameMedian for Nuke from Hagbarth on Vimeo.


Available on Nukepedia.

GrainCheck for NukeStudio & Hiero

November 30, 2015

It was quite fun to see that 2 days after publishing the CubeKeyer post Nuke 10 was announced with a keyer for NukeStudio. And since Nuke 10 is so close, i don’t see a reason to release mine.

It is nice to see that they added BlinkScript support under Nuke Studio, meaning that we can create our own timeline effects as we please, and i hope that the GLSL path means that we can get GPU acceleration  from non-supported GPU’s. So i am really looking forward to that.

However we still have the Blink limitation in that we can only access 1 layer at a time, so i still hope to see a RV level GLSL like support in the future. At launch, NukeStudio 10 and Hiero 10 will also not support random access, meaning that there are still a few things we can’t do, unlike the Nuke counterpart. Like doing grain check and edge detection that are vital for QC. So i am going to release my NukeStudio GrainCheck QC tool.

GrainCheck for NukeStudio & Hiero is a SoftEffect that gives you 3 options.

  1. Grain Check (Laplacian)
  2. Edge Detection (Sobel)
  3. Saturation Check

GrainCheck

As Theodor Groeneboom have already written a clean convolution matrix some years ago, i used his code as a base (i guess i owe you a beer Theo!), but its pretty self explanatory. As the GLSL syntax was changed in Nuke 9.0v7 i have added a pulldown menu to select the Nuke version range you use.

Download it here

Installation:

  1. Put the “GrainCheck.gizmo” in your /.nuke folder (ie \.nuke\GrainCheck.gizmo)
  2. in “\.nuke\Python\Startup\init.py” add the following:
    from hiero.ui import registerAction
    from PySide.QtGui import QAction, QIcon
    import nuke
    nuke.load ("GrainCheck")
    action = QAction(QIcon("icons:LUT.png"), "GrainCheck", None)
    action.setObjectName("foundry.timeline.effect.GrainCheck")
    action.setToolTip("GrainCheck for Nuke Studio")
    action.setData("GrainCheck")
    registerAction(action)
  3. Now the GrainCheck SoftEffect should be available in the softeffect list.
  4. (note that as this node uses the gpuOP node, it will not render but only display in the viewport)

CUBE Keyer for Nuke Studio & Hiero

November 13, 2015

CUBE Keyer for NUKE STUDIO and HIERO from Hagbarth on Vimeo.

Two weeks ago i finished a small feature film project, with 50% of the VFX work being greenscreen shots. And there I realised that it is a bit of a shame that Nuke Studio does not have a keyer. Sitting in the timeline environment trying to figure if the shot is going to work or not. This usually ends up in having to go from real-time land, into comp land, which can be a bit tricky when dealing with 8 minute plates. And just the convinience of being able to get a rough idea of how its going to look and aid clients who can’t abstract from greenscreen temps.

Next week we have another project with alot of keying shots, and I thought it would be a great idea to spend some time up front, to get a proper solution to the problem. Speaking of solutions.. this appear to be the current “best pratice:

gs_01
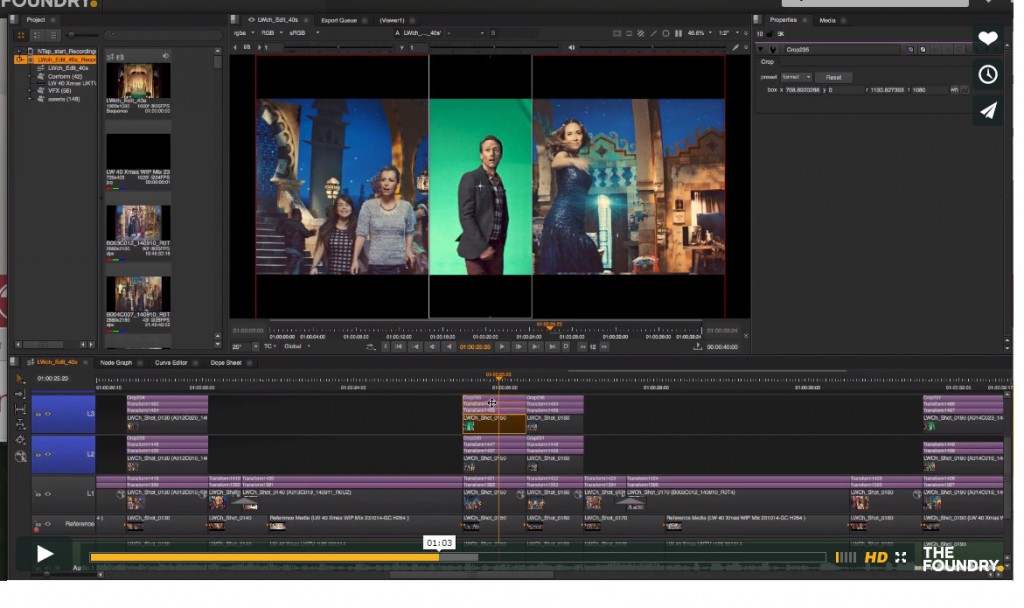
The new blend layers (introduced in Nuke 9.0v7) in Nuke Studio and Hiero enables use of masking and alpha channels. And while cropping like above seem like a desperate move, it does open up for just the right stuff we need.

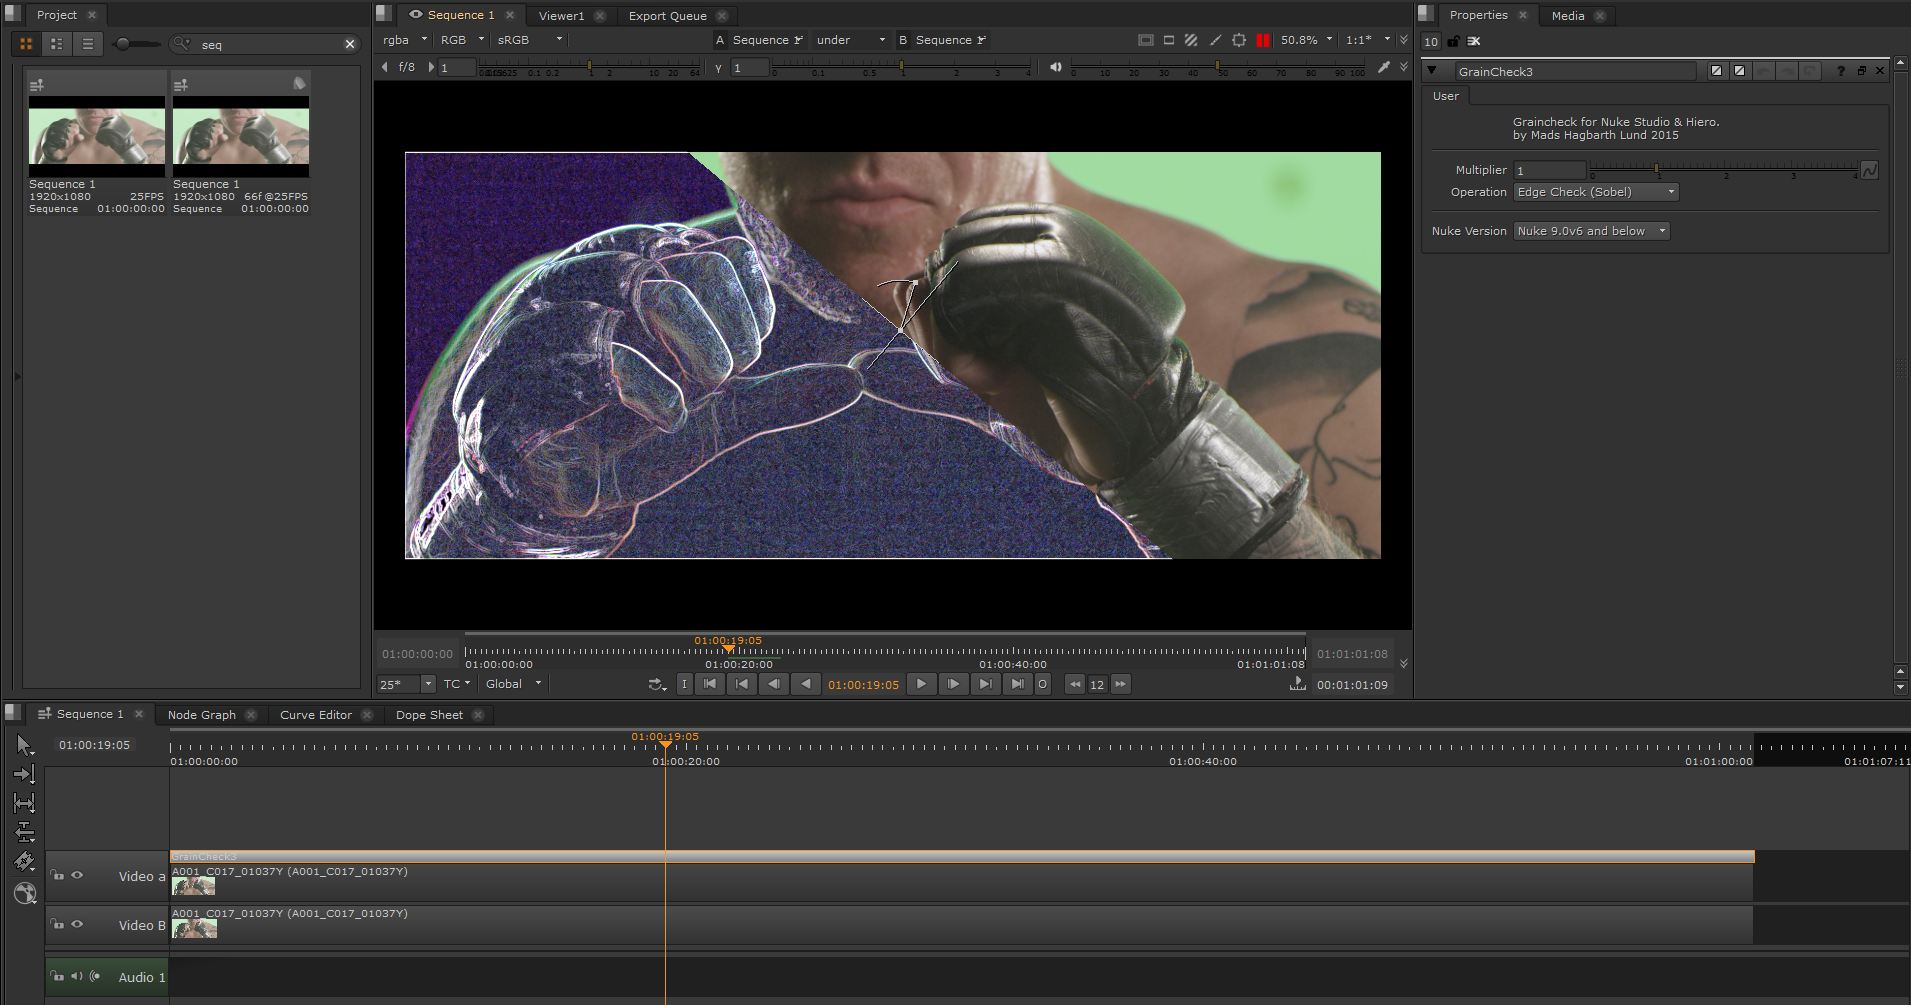
If you want to create custom “Soft Effects”, you can only use the predefined GPU accalerated notes that allready appear in the softeffects tab. You cannot use merges, shuffels, expressions, blinkcript or other nodes you would typically use for this. So a traditional node based keyer is out of the question. Well… There is one node that is not in the Soft Effects tab, that works in Nuke Studio. It is the “GPUOp” node.

gs_02

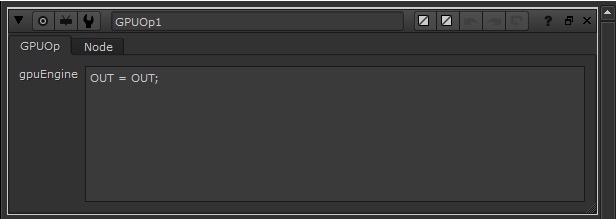
The GPUOp node is a unique node that only renders to the viewport (not to the node tree). Using openGL shading langaue it works nearly identically to the blinkscript node, giving you a script editor and executes in runtime. This gives us great power to add (view only) tools that is not possible with any combination of the other supported nodes.


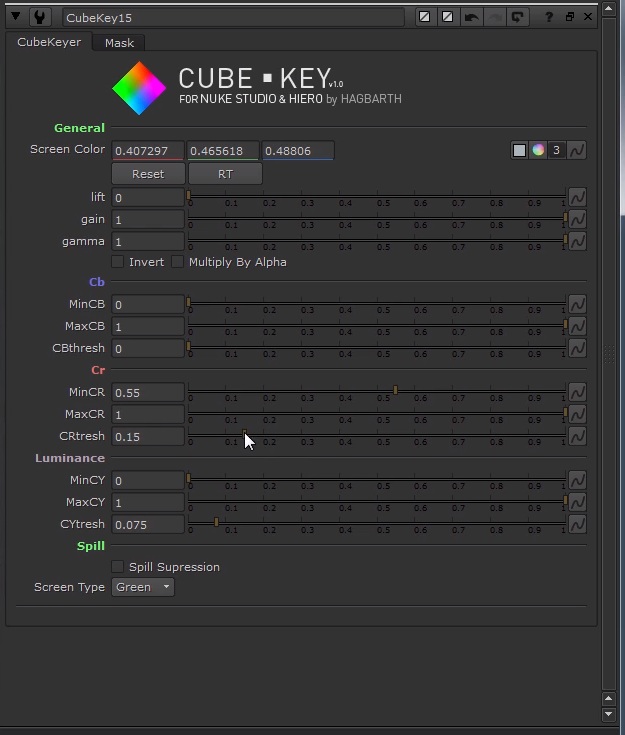
So to solve my problem i decided to re-purpose a old keyer that i originally designed for beauty work.
The essence of the keyer is to basic steps:

To get a good chroma seperation i turn the input from RGB into YCbCr

//CONVERT INPUT INTO YCBCR SPACE
float CY = IN[0]*0.299+IN[1]*0.587+IN[2]*0.144;
float CB = (IN[0]*-0.159+IN[1]*-0.332+IN[2]*0.05)+0.5;
float CR = (IN[0]*0.5+IN[1]*-0.419+IN[2]*-0.081)+0.5;

I then use basic linear keying (could be optimized a bit)

//COMPUTE LINEAR KEY
float CYKey = min(min(1.0,(1.0/(CYLowMax-CYLowMin))*CY-((1.0/(CYLowMax-CYLowMin))*CYLowMin)),min(1.0,(1.0/(CYHighMin-CYHighMax))*CY-((1.0/(CYHighMin-CYHighMax))*CYHighMax)));
float CBKey = min(min(1.0,(1.0/(CBLowMax-CBLowMin))*CB-((1.0/(CBLowMax-CBLowMin))*CBLowMin)),min(1.0,(1.0/(CBHighMin-CBHighMax))*CB-((1.0/(CBHighMin-CBHighMax))*CBHighMax)));
CBKey = smoothstep(0.0,1.0,CBKey); //removing this improves performence of keyer!
float CRKey = min(min(1.0,(1.0/(CRLowMax-CRLowMin))*CR-((1.0/(CRLowMax-CRLowMin))*CRLowMin)),min(1.0,(1.0/(CRHighMin-CRHighMax))*CR-((1.0/(CRHighMin-CRHighMax))*CRHighMax)));
CRKey = smoothstep(0.0,1.0,CRKey); //removing this improves performence of keyer!

I can then take the keys and multiply them with eachother, and add other controls like basic lift-gamma-gain, clamp, invert, spill supression and what not.

gs_03

(i know its Y and not CY)

Comming soon!

Spotflare V3 development

October 26, 2015

Mirror
(Image copyright Richard Gale)

I am a huge fan of Dog Schidt Optiks. The strange optical artifacts and unique flaring gives these lenses character. And most of these artifacts are incredibly hard to replicate in post which makes them just that more interesting. If you look at a video like Richard Gale’s festival of 50mm lenses you get a good sense of what this is all about.

Earlier this year, during the RnD period for a project im wokring on right now, I updated my Spotflare toolset to add some of these unique characteristics. Most of this will eventually go into a public release of Spotflare V3. Everything is done procedurally using expression nodes.
Here are some videos of the RnD progress:

Flat shimmer:

Deep shimmer:

Stay tuned for more about Spotflare V3.